
Last Updated on March 27, 2023 by Kevin Chen
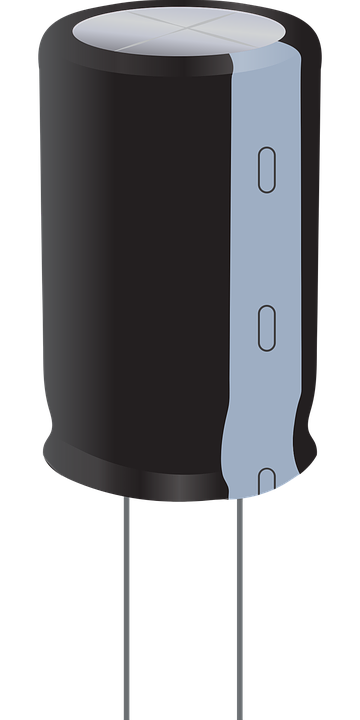
Image source Pixabay
The function of a capacitor is to store electric charge. It is capable of storing some significant amount of voltage even after the power supply to a device has been cut off. Many electronic devices and appliances tend to utilize the charge-storing functionality of capacitors.
In as much as the capacitors can be charged, they can also be discharged. There are various methods of discharging capacitors. One of them involves using a screwdriver.
Probably you triggered given the sensitivity and risk of handling an electric component that stores charges. And discharging it just makes things riskier.
Read on as we break down the guide for discharging a capacitor using a screwdriver.
Why should I discharge a capacitor?
Before you arm yourself with a screwdriver, we have to go back to the basics: is there any valid reason why I should discharge a capacitor?
The answer is Yes. There are several factors that will force you to discharge a capacitor.
Regardless of the application areas, here are some top reasons for discharging capacitors:
- When doing repair and maintenance: o you suspect that your electric device or appliance is faulty? You will need to work on it, and discharging the capacitor is one of the mandatory processes. Discharging will prevent possible electric damage and even injury that can be caused by the capacitor during repair and maintenance.
- When resetting an electric circuit: There are various instances when you will have to reset an electric circuit. One of them is when the circuit stops working as normal and remains in a particular state. Discharging a capacitor may be a form of resetting it hence allowing it to operate as it used to.
- When testing the capacitor: What if you want to find out the state of the capacitor? Maybe you would want to know its capacitance or if it is in good working condition. You will have to discharge it before proceeding with the testing process.
- For storage and preservation: Let’s say you want to keep a device or capacitor safely for future use. It will be a smart move to discharge it. The same applies when you want to transport the capacitor.
Knowing the reasons we have listed here, there is no doubt that discharging capacitors is an essential practice.
Safety precautions before discharging the capacitor
You should take utmost care and precautions when handling electric charges. More so when dealing with the capacitor as it is the main storage unit for charges. A simple mistake can lead to injuries and even loss of life.
Here are the key safety precautions that you should take before and when discharging the capacitor using a screwdriver:
- Ensure that the power supply is off. You can even disconnect the device from the power socket.
- Wear electric protective gear and clothes that are designed to protect you from the dangers of electric shock.
- Wait for some minutes even after discharging the capacitor before you handle it again.
- Do not use force to discharge the capacitor
- In all that you do, avoid shorting the terminals of the capacitor. This can lead to the risk of sparks and fire
- Be keen on the polarity of the capacitors some capacitor types such as electrolytic capacitors are sensitive to the reverse polarity.
- Use a pair of insulated pliers when handling the capacitor. This is done to minimize the risk of electric shock
- Ensure that there are no loose wire hangings when discharging the capacitor.
- Consult experts when not sure of how to discharge the capacitor.
Discharging capacitor with a screwdriver: Steps to follow
At this point, I can comfortably assume that you are ready to discharge the capacitor using a screwdriver.
Among the tools and equipment that you should arm yourself with for this job include a screwdriver and a multimeter.
Step 1: Set up your multimeter
A multimeter will be your ultimate companion when it comes to discharging the capacitor with a screwdriver.
Turn off the power supply that is going to the device hosting the capacitor.
Setting it up simply means verifying that it is within the expected voltage range of the capacitor.
And how do I know this voltage range?
Just check the specifications of the capacitor as labeled by the manufacturer.
Once you know the voltage range, you can proceed to position one probe of the multimeter on the respective leads of the capacitor. The positive and negative probes of the multimeter should be on the respective terminals of the capacitor.
Not sure about which probe should go to what terminal? The colors of the probes will come in handy. The red probe of the multimeter should connect to the positive terminal and the black probe to the negative terminal of the capacitor.
After a successful connection, look at the readings on the multimeter. Regardless of the numbers that the multimeter displays, they should be consistent. Major discrepancies could be a sign of damaged capacitor.
Step 2: Connect the leads to the screwdriver
As we have already mentioned, a screwdriver will be the main tool for discharging the capacitor.
Start by stripping off at least ½ inch of the insulation from the ends of the two leads.
Twist the ends of the leads on the blade of the screwdriver. The negative lead should be on the black probe while the positive lead on the red probe.
While connecting the capacitor to the screwdriver, ensure that there is perfect contact between the metal blade of the screwdriver and the twisted leads. A pair of pliers may come in handy in securing such connections.
Step 3: Monitor the readings on the multimeter
In this step, you should have a keen eye on the multimeter.
Take note of the readings on the multimeter and go ahead to record them.
Just after connecting the wires to the screwdriver, the needle on the multimeter should briefly deflect upwards and then start coming down. This should happen every time you connect each terminal of the capacitor to the screwdriver.
The behavior of the needle shows that the capacitor has been discharged. Continue doing so until you are sure that no residual charge is left.
Ensure that you have a firm grip on the screwdriver and the two leads from the terminals touch the screwdriver’s blade simultaneously.
Also, ensure that the handle of the screwdriver is properly insulated. This is because during the discharging process, the charges will be moving across the blade and this will be dangerous to you. A rubber or plastic handle will do the job.
At the end of this step, your capacitor should be fully discharged.
Step 4: Place the screwdriver across the leads of the capacitor
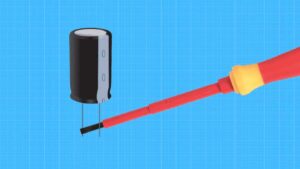
Image source Electro university
From the previous step, you are sure that the capacitor is fully discharged. The readings from the multimeter prove this.
At this point, you should proceed to position the screwdriver across the terminals of the capacitor.
In other words, you will be shorting the capacitor.
If there are no sparks, then it means the capacitor is fully discharged
Step: 4 Confirm the multimeter reading
This step is to verify that there are no charges on the capacitor. Once you connect the probes of the multimeter to the terminals, check out the readings. It should indicate zero volts meaning that the capacitor is discharged.
Another safety tip to remember when using this method is to always keep your eyes and face away from the capacitor when discharging.
Dangers of using a screwdriver to discharge a capacitor
While using a screwdriver is a popular method of discharging capacitors, it is always not advisable to use it. The main reason behind this is the risks associated with the discharging process.
Usually, a capacitor is capable of storing any amount of electric charge. In some cases, the charges can be too much to cause fatal results in case the discharging process is not handled well.
From the steps that we have discussed, using a screwdriver to discharge exposes you to numerous risks.
If you do not have adequate experience or accidentally handle the tools, there is a likelihood of the risk escalating into something big.
So, before you decide to take this route, ensure that you are fully sure of what to do and how to handle the screwdriver. Of course, the guide and steps that we have listed here should back you up.
Is there a special tool for discharging capacitors?
Yes, there are specialized tools and equipment designed for discharging capacitors. These tools are highly reliable as they ensure the capacity is fully discharged. Additionally, discharge machines are designed with safety in mind.
One such tool is the discharge pen. It is a small tool that will do this job perfectly. We cannot ignore the fact that the pen is quite affordable.
You can find different types of capacitor discharge tools from reliable electronic component suppliers. Choose one that will work for you.
In conclusion, I hope that you have learned how to safely and effectively discharge a capacitor with a screwdriver. You are also free to use other discharge methods and tools.
If you want to find more Electronic Components Distributors, please check out the following articles:
Electronic Components Distributors In the USA
Electronic Components Distributors In UK
Electronic Components Distributors In China
Electronic Components Distributors In India
Electronic Components Distributors In Singapore
Electronic Components Distributors In Malaysia
Electronic Components Distributors In Vietnam
Electronic Components Distributors In South Korea
- Where to buy IC chips? The Best Guide? - March 26, 2024
- Breaking Down Barriers: Overcoming Obstacles in Cross-Border Electronic Component Trade - March 4, 2024
- Everything You Need to Know About Amplifier IC Chips - March 4, 2024


