
Last Updated on October 22, 2023 by Kevin Chen
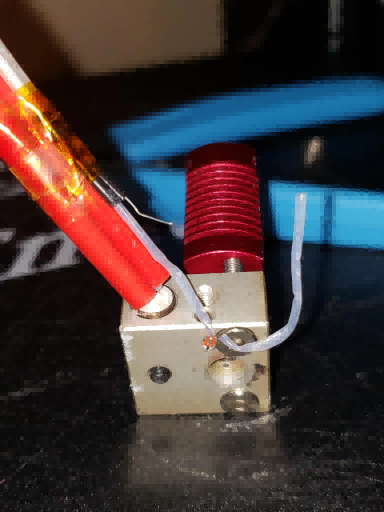
Image Source: Reddit
A thermistor is a type of resistor that changes its resistance based on the temperature of whatever it’s connected to.
It’s used in devices like microcontrollers or other digital electronics that need to sense heat, and it’s one of the simplest ways to do that.
This article will explain everything you need to know about thermistors and how to recognize the warning signs if your thermistor is broken.
And once you discover that your thermistor is broken, we will give you tips on how to fix the problem
How do thermistors work?
Thermistors are an easy and cheap way to check temperature, and they can be found in a wide range of devices. They are made of special materials that expand or contract based on the temperature of their environment.
That change in length creates a voltage change in the thermistor that can be measured to determine the temperature. It’s an easy way to get temperature readings without having to use a sensor that has to be placed in the specific location. There are a few different types of thermistors, each designed for a particular temperature range. These are usually indicated by the color of the thermistor, and the color code can be found in the datasheet for the specific device.
How do I know if my thermistor is broken? signs
If you notice anything out of the ordinary, you should inspect your thermistor. The most common indication of a thermistor failure is an extremely high resistance value.
If you have a digital multimeter, you can measure the resistance of the thermistor to see if it’s higher than normal.
If you don’t have a multimeter, you can use a digital thermometer to measure the temperature at the location of the thermistor. If the temperature is higher than normal, something might be wrong.
Another indication of a thermistor failure is a change in the temperature reading. If the temperature being measured doesn’t match the temperature of the thermistor, then something might be wrong.
You can also look for discoloration or a change in the physical appearance of the device, as this can sometimes be a sign of damage.
If the discoloration is localized, it could be a sign of a short circuit. If the discoloration is widespread, it could be a sign of a failure that has caused the thermistor to overheat.
What causes a thermistor to break?
There are a wide range of possible causes for a broken thermistor. A few common causes are:
– Overheating – A thermistor will fail if it overheats, so watch out for devices with a thermistor that are getting too hot.
– Mechanical shock – If a thermistor is subjected to shock, it may be broken. This is especially true when using thermistors in a high-impact environment, like in a robot or a R/C car.
– Shorted leads – If the leads of the thermistor are touching, then electricity will flow through the thermistor without being checked by the resistance. This can cause it to overheat and fail.
What happens if a thermistor fails?
If a thermistor fails, it will start to behave like an open circuit. This means that the voltage at the thermistor will be 0V, even if the temperature at the thermistor is 100°C.
If you have a circuit that is checking for a specific temperature, and you don’t have another temperature sensor to check the thermistor reading, then the circuit will never turn on.
This is especially bad for things like heated beds on 3D printers, where you want the circuit to turn on if the bed is below a certain temperature.
If the thermistor is used as an analog input on a microcontroller, then the voltage reading will be 0V instead of the temperature that the thermistor is reading.
This can cause your program to read a 0°C temperature when the thermistor is reading a high temperature.
Steps for fixing a thermistor
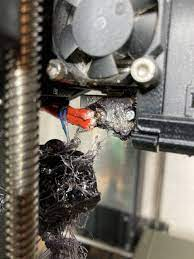
Image source prusa3d
Step 1: Identify the type of thermistor
The first thing you should do if you think your thermistor is broken is to identify the type of thermistor.
This will help you determine what might have broken and what you should do next. If you don’t have the datasheet for the thermistor, you can usually figure out the type just by looking at the device.
The data sheet will also tell you everything you need to know about your particular type of thermistor: how it works and how to use it. Be sure that the part number listed on your device matches up with the part number in the data sheet; this will allow you to find all of the information that applies specifically to your device.
For example, if you have a small disc-shaped device with two wires coming out of the top and embedded in some sort of protective coating, there are only a few possible types.
There are a variety of ways to identify a thermistor, so if you don’t have the data sheet, don’t worry!
Step 2: Visually inspect the components of the thermistor
Do you want to fix your broken thermistor? You should visually inspect the different components of the thermistor to try and determine the cause of the failure.
You can do this by unplugging the thermistor from the device it’s connected to and looking at the wires, the connecting end, and the protective coating surrounding it.
If there are any signs of damage, then you can rule those out as causes of the failure.
If you have a multimeter, you can test the wires and the connecting end of the thermistor to make sure they’re functioning properly. If you don’t have a multimeter, you can test the wires with a digital thermometer.
Touch the two probes to each of the wires, and the thermometer will read the temperature of the wires. If the thermometer reads 0°C, then the thermistor is broken.
Step 3: Check out the resistance
The next step is to check out the resistance. Most thermistors are resistors that range from 10kΩ to 1MΩ or higher. To find this number, you can either measure it with an ohmmeter or take a look at the datasheet if you have access to one. This way, you can find out whether your thermistor has broken or not and how bad it is.
Step 4: Inspect the connecting wires
If the thermistor has damaged wires, you’ll need to either replace the wires or re-solder the existing wires. If the connecting end of the thermistor is damaged, you’ll need to find a replacement.
If the protective coating is damaged, you may be able to replace it. Thermal epoxies, like those used in hot water pipes, can be used to re-seal the coating around the thermistor.
Step 5: Check out the protective coating
If the protective coating is damaged, you may be able to repair it by applying a fresh coating.
If the coating is discolored or cracked, it is likely that the thermistor is generating too much heat and has failed.
You can try to repair the coating with a fresh coating of thermal epoxy, or you can try to remove the thermistor and re-solder the leads to a new thermistor.
Step 6: Check out the electrode
If the electrode of the thermistor is damaged, you’ll need to find a replacement.
You may be able to find a compatible thermistor that has the same pinout and can be soldered to the device.
If that’s not an option, you can use a pair of pliers to remove the broken electrode.
If the electrode has broken off, you’ll need to either find a way to re-attach the electrode or replace the thermistor.
Step 7: Check the continuity
Another thing to check when testing your thermistor is continuity. This means finding out if there are any open or short circuits in the device that you’re trying to troubleshoot. If there are no open circuits, then your thermistor may be fine and the problem is somewhere else in your circuit. If you have a multimeter, you can use the continuity test feature to check this. If you don’t have a multimeter, then you can try using a test light to see if there are any open circuits.
Consider replacing the thermistor
If you’ve inspected the thermistor and found signs of damage, you may want to consider replacing it.
A broken thermistor can cause problems in your circuit and can be expensive to replace. If you replace the thermistor, you’ll be able to get back to using your circuit. If you’ve found signs of damage, you may be able to find a compatible part that will solve the problem.
If you haven’t found signs of damage, there’s no harm in keeping the thermistor and just monitoring it for signs of failure. If you’ve found signs of damage, you may want to consider replacing the thermistor. You can then use the information in this article to pick a suitable replacement.
While at it, ensure that you source from a reputable thermistor supplier in China. We at ICRFQ will ensure that you get the perfect thermistor for your application.
If you want to find more Electronic Components Distributors, please check out the following articles:
Electronic Components Distributors In the USA
Electronic Components Distributors In UK
Electronic Components Distributors In China
Electronic Components Distributors In India
Electronic Components Distributors In Singapore
Electronic Components Distributors In Malaysia
Electronic Components Distributors In Vietnam
Electronic Components Distributors In South Korea
- Where to buy IC chips? The Best Guide? - March 26, 2024
- Breaking Down Barriers: Overcoming Obstacles in Cross-Border Electronic Component Trade - March 4, 2024
- Everything You Need to Know About Amplifier IC Chips - March 4, 2024


