
Last Updated on October 22, 2023 by Kevin Chen
LED lights are one of several options for adding a splash of color and movement to your house or landscape. In recent years, their popularity has surged, and they are now the standard. LEDs are well-known for being the most environmentally friendly light bulbs available, but they provide much more. They have built-in heat sinks that can help regulate temperature variations and prevent performance concerns in the future. Despite the enhanced protection, problems like degradation and color changes are still possible.
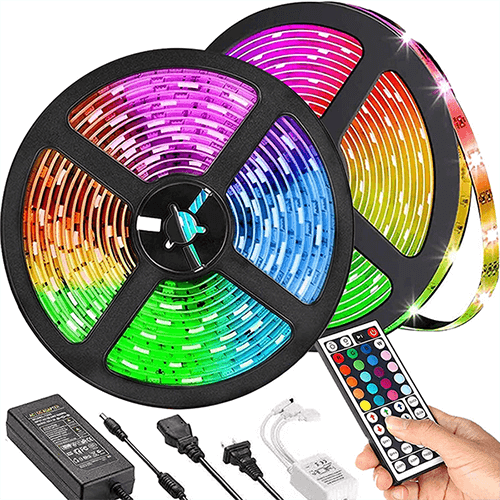
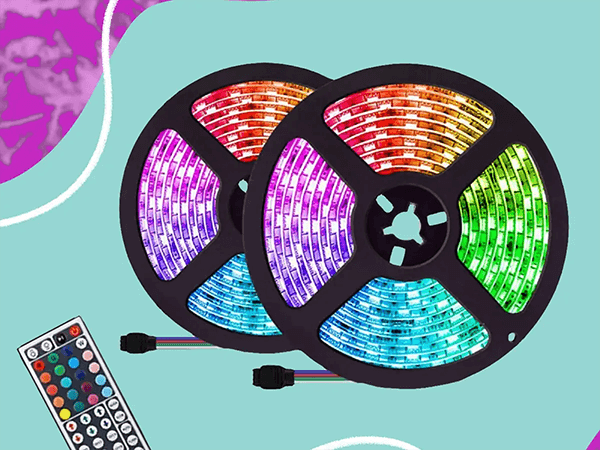
Strip lights are one type of LED we use for entertainment and ambient lighting; many homeowners have complained about dim lights or color shifts at the end of the strips. Bulbs have had their fair share of issues over the years, including flickering, short lifespans, and dimming to their lightest color. As a result, I’ll go over the reasons for this and the prevention strategies below.
What are LED lights?
‘LED’ stands for ‘Light Emitting Diodes.’ Daily, this highly advanced manner of producing light consumes significantly less energy, lowering your electricity expenditures. Not only that, but LEDs have a slew of extra features that aren’t available with regular bulbs. Electric current is routed through a chip, igniting these little light sources (the LEDs).
The LEDs then generate enough power to light the bulb while also managing any temperature changes due to the process. It also comes with a heat sink. As a result, there are no long-term performance problems. So, even though they are designed to survive, many can and will go wrong.
Known Issues with LED
LED strips are extremely bright and require a large amount of power to operate. A short strip with just 10 LEDs, for example, draws around 600mA if each diode draws 60 mA, which is quite significant. As a result, power sources must be sufficiently large and powerful to support many strips. This current can significantly heat the strips if sufficient precautions are not followed.
LED Strips Are Overheating
Like the numerous components that make them up, LED strips require suitable heat dissipation elements. The first is the LED strip’s adhesive tape. Quality manufacturers usually add a cooling adhesive.
Ceramic particles in the tape can drain heat away from the strip, dissipating it away from the sensitive diodes. Casings and conduits, which hold LED strips and are optional additions, can considerably reduce overheating.
Because of the metal’s conductive qualities, the aluminum casings or channels act as a heat sink and aid in cooling the strip. If you want your LED strip set up to last in a professional setting, aluminum channels will keep your LEDs from overheating and help them stay longer. Finally, the surface on which you attach your strips, as well as the position in which you mount them, will make a significant difference.
Under cabinets, mattresses, and other furniture are frequently our first choices. Because wood is a good insulator, it absorbs the heat from the strip, causing it to overheat. Mounting the strip lights on metallic or ceramic surfaces, if available, will substantially aid heat dissipation.
Placing them in confined or hot areas of the house, such as adjacent to stoves or other gadgets such as TVs or consoles, will enhance the ambient temperature at which the LED must operate. Your LED light strips’ lifespan will be reduced due to this.
Not Enough Air Ventilation
As previously stated, LED strip lights that do not receive sufficient cooling become overheated, causing the diodes to change color. One of the most prevalent causes is a lack of air circulation around the lighting system. Because there isn’t enough space, warm air can’t go away, and chilly air can’t get around.
In most cases, the appropriate selection on where to place them is required to avoid this. Spots behind sofas and beds, between the back panel of a cabinet and the wall, or around the frame of a tiny shelf with tighter corners aren’t ideal. All spaces would be unable to provide adequate air ventilation.
Paint in Circuits
One of the less well-known but all-too-common causes of LED failure is that you have mistakenly painted over them! This is something that lighting professionals have seen time and time again:
People can color their LED strip light sets around the house or office immediately or later after installation. Even a drop of paint on the diode will cause it to generate light that is dull, faded or even a different hue.
Keep your strips protected when painting and clear any old paint off them with paint removers to maintain full illumination. One of the worst consequences of painting your strip light is that some paint may end up in the circuitry or wiring. In this situation, the strip could be fully shorted or damaged, causing it to flicker, change colors unexpectedly, or stop working.

Why Are the LED Strips Changing Colors?
There may be many issues with LED lights in different colors. Those are-
Voltage drops
The wires in LED strip lights are two copper ribbons that run the length of the strip. As you travel away from the power source, the color of your LED strips will shift. Because of a voltage loss, this is the case. Consider a circuit that is powered by electricity. Positive and negative wires are both present. The current flows from one wire to the next until it reaches its destination.
If you wish to employ a lot of inexpensive LED strips, this is not the case. Copper is a metal used in the manufacturing of electricity. Copper content is lower in low-cost LED strips than in higher-cost LED strips. As a result, the lower the copper content, the higher the resistance, hence the voltage drop.
Overheating
LED strips can change color if they get too hot; respectable manufacturers include heat dissipation mechanisms in their glue. Their adhesive incorporates ceramic particles that allow heat to be diffused away from sensitive diodes and wicked away from the strip. Following that are aluminum casings or channels that serve as heat sinks for the strip’s LEDs. On the other hand, LEDs can overheat when exposed to too much heat.
LED strips are great for illuminating dark regions where natural light is scarce. If you want your LED strip to survive a long time and work properly, place it on a surface that will not overheat. Install the LED lights on metallic surfaces rather than wood to enhance heat transfer. Premature aging can be influenced by extended exposure to high temperatures because woods retain more heat.
Paint in circuits
One of the lesser-known but all-too-common reasons for LED failure is painting over them! After being placed, people can color their LED strip light sets. A drop of paint on the diode causes it to emit light that is dull, faded or even a different color. To retain complete lighting, keep your strips protected and remove any old paint with paint removers.
One of the worst things if you paint your strip light is that some paint will go into the circuitry or wiring. The strip could be entirely shorted or damaged in this case, causing it to flicker, change colors randomly, or stop working.
Not enough air ventilation
One of the most severe dangers to LED strip lights is insufficient air ventilation. Overheating these diodes might cause them to change color and degrade. This occurs when there isn’t enough room for warm air to escape and cooler air to move away from the lighting arrangement. As a result, make sure they’re at a location where they’ll get enough air.
How to fix LED lights that are different colors?
One of the benefits of using LEDs instead of traditional lighting is selecting from a wide range of colors to light your space as desired. This allows for mood lighting or mixing colors in the same room. If you sincerely like it, you can have Christmas every day of the year!
Unfortunately, the more functions a piece of technology has, the more probable something will go wrong at some point. As a result, many of you have reported that this function appears to be causing the system to crash. The most common issue is that the incorrect colors are shown incorrectly.
Unfortunately, there are several possible causes for this problem. As a result, it’s impossible to pinpoint a single cause. But, regardless of the reason, we can try several therapies to get things back to normal. Following these methods will help you fix it:
Check that everything is plugged incorrectly.
The most likely cause of this problem is that your LED lights were not correctly plugged in. Unfortunately, this is a relatively easy problem to fix.
- First, make sure the RGB strip connector’s black wire is attached to the +12V on the same side as the +12V.
- Next, double-check that the connector’s + end is aligned with the strip’s positive side.
- Check that your R, G, and B wires are all connected correctly while you’re at it.
It can be inconvenient when this happens, and customers have complained that their wires have been mislabeled on occasion. Unfortunately, you have no choice except to play with the cords until you find the magical combination that restores functionality.
By Resetting the LED Lights
For the most part, the preceding step should have sufficed, but if it didn’t, check off the next item on your list. Even though this fix appears to be way too simple to be effective, you’d be surprised at how powerful a simple reset can be. Indeed, this patch is standard and works on so many devices that IT pros joke that if users only followed this step before contacting support, they would be out of a job.
Resetting the lights and the controller is all that’s required for this fix. Everything is reset to factory defaults. Your settings may change over time, causing your lights to stop working. Undoing such changes and removing defects that may have crept in over time is as simple as resetting the machine.
Although we’d love to show you how to reset your lights, there are too many distinct types and models to cover. Each one has its own set of parameters.
- There almost always appears to be a specific reset button for you to press.
- If not, you can usually do so by pressing and holding the power button for an extended time.
- If none of these choices work, it’s a good idea to search up the manufacturer’s information on the internet to save any more guesswork.
Replace the Controller/LED Strip
We’re afraid to say you’ve reached the end of your luck at this time. If the two remedies above don’t work, your LED strip or controller is likely broken.
Unfortunately, there is no cost-effective way to avoid this, so your only alternative is to replace one or both of these components. Try controlling your LED strip with a different controller to narrow the problem down. You’ll have to replace your LED strip if this doesn’t work.
How to Fix Voltage Drop in your LED?
Lowering the brightness gradually is a straightforward approach to correct voltage loss. You can adjust the brightness of your LEDs so that each one consumes less energy, leaving you with more. You can even go above and beyond to achieve a brighter, color-free glow.
If you buy a pre-packaged solution from a company like Philips hue light, they will usually figure it out for you. They automatically reduce the strip’s brightness at the beginning and end to ensure decent looks. This technique does not allow you to join the strips to create longer strips. The cost of a strip would increase as well.
Conclusion
LED strips are a fantastic and reasonably inexpensive way to add a little more character and charm to your living spaces, but they are not without flaws. So, if you’ve tried everything and still haven’t had any luck, the best thing to do is start over.
We know that some of you have devised fresh and highly inventive solutions to the problem. If you’re one of these people, please share your strategies in the comments area below. That way, we can pass the knowledge on to our readers and possibly save some more folks some trouble in the future.
Lastly, for LED electrical components or other electricity fitting components, purchase them from us; we at ICRFQ are the best electrical components manufacturers in China.
If you want to find more Electronic Components Distributors, please check out the following articles:
Electronic Components Distributors In the USA
Electronic Components Distributors In UK
Electronic Components Distributors In China
Electronic Components Distributors In India
Electronic Components Distributors In Singapore
Electronic Components Distributors In Malaysia
Electronic Components Distributors In Vietnam
Electronic Components Distributors In South Korea
- Where to buy IC chips? The Best Guide? - March 26, 2024
- Breaking Down Barriers: Overcoming Obstacles in Cross-Border Electronic Component Trade - March 4, 2024
- Everything You Need to Know About Amplifier IC Chips - March 4, 2024


