
Last Updated on July 28, 2022 by Kevin Chen
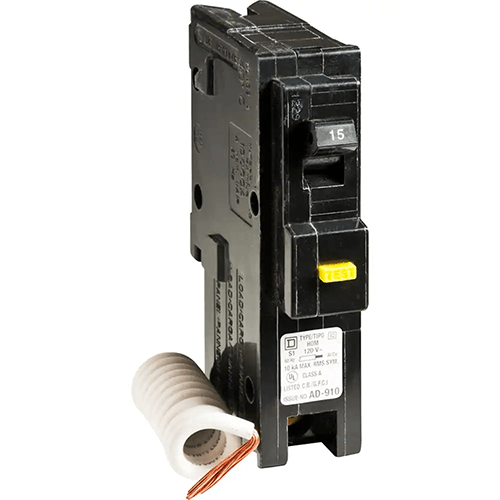
Image source lowes
A ground fault circuit interrupter (GFCI) breaker is a safety device that shuts off power to an electrical outlet if it detects even the slightest imbalance of current. It is almost always in response to something called “neutral-to-ground” voltage.
A ground fault occurs when electrons from the neutral and ground meet somewhere other than at the neutral or grounded outlet. This causes a negative and positive charge, triggering the GFCI breaker.
In this article, we will discuss everything related to how you can install a GFCC breaker in your home.
Tools for the job
Here are the tools you will need for installing GFCI breaker:
-Screwdriver for opening and closing the breaker panel cover
-Wire stripper for removing the wire from the breaker box
-Electric drill with a ¼” bit
-Wire nuts (for connecting wires to the GFCI breaker)
-GFCI circuit tester
-Cable ties (for bundling wires)
-Voltage tester for checking and verifying the line
-Rubber gloves for extra protection
Step-by-step guide for installing GFCI circuit breaker
Now that you have the tools ready, here are the steps that you should follow when installing GFCI circuit breaker.
Step 1: Turn off the main switch
Turn off the main switch first. This is the most important step that you need to do before you start wiring the GFCI circuit breaker.
Take note that turning off the circuit breaker does not mean that the panel will be completely safe. There are other circuit branches in the panel and they contain electric current. To be safe, avoid touching the main breaker panel and even the service wires directly.
Step 2: Remove the cover panel
Remove the cover panel from the breaker box using a screwdriver. It is easier if you remove both of the screws that are located on top of each other at a right angle towards each other. You will see a little hole in between them, which needs to be unscrewed so that you can remove it.
After removing both screws, lift up and remove it from its place to expose all of your breaker box’s wires and cables inside.
Step 3: Remove knockout plate
Remove knockout plate using a screwdriver. It is easier if you remove both of the screws that are located on top of each other at a right angle towards each other. You will see a little hole in between them, which needs to be unscrewed so that you can remove it. After removing both screws, lift up and remove it from its place to expose all of your breaker box’s wires and cables inside.
Step 4: Analyze circuit breaker circuit
Before you start wiring your GFCI breaker, here are some things that you should consider first about your existing circuit breaker circuit. For example, does this circuit include any switches? Does this circuit include any fuses? Is there any neutral wire connected to this line? Is there any ground wire connected to this line? Is there any neutral wire connected to this line? Is there any ground wire connected to this line?
If you find any of these questions answered with a “YES”, then you can safely proceed to wiring your GFCI breaker.
Step 5: Connect GFCI breaker wires
Once you have removed the GFCI breaker box’s cover and have access to all of its wires and cables inside, you can start connecting the wires.
First, connect the neutral wire from your existing circuit breaker box to the GFCI breaker’s neutral screw. Then connect the ground wire from your existing circuit breaker box to the GFCI breaker’s ground screw. Then, connect the green wire from your existing circuit breaker box to the GFCI breaker’s green screw. Then, connect the white wire from your existing circuit breaker box to the GFCI breaker’s white screw.
Where does the white wire on a GFCI breaker go?
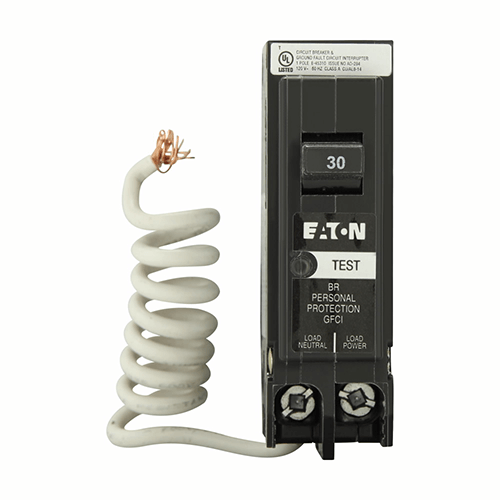
Image source Eaton.com
The white wire is connected to the neutral supply of the mains panel board. This wire is used to detect the presence of a “hot” conductor in the GFCI circuit. The white wire is not used on a GFCI breaker that has no neutral (this usually means that the existing circuit breaker box is a “double pole” type).
If you have an older GFCI breaker that has no neutral, then you can use either of these methods to connect it:
1) Add an inline fuse holder and fuse (if you’re unsure what this is, see this post ) to your existing circuit breaker box. Solder this wire directly to the green screw on your GFCI breaker’s neutral terminal. This will allow you to connect your GFCI breaker without having to remove any other wires from your existing circuit breaker box.
2) Cut a length of wire equal to the length of your existing white wire, and strip off about 2 inches of insulation. Solder this wire directly to the white screw on your GFCI breaker’s neutral terminal.
Step 6: Install new GFCI breaker
After you have connected all of its wires and cables, you can now install your new GFCI breaker in its place. To do so, first attach the ground screw and then attach the green screw and then finally, attach the white screw.
And that’s it! Your new GFCI breaker is now complete!
Step 7: Test the new circuit breaker
Once the circuit breaker is in its perfect position, you can go ahead to test whether it is working perfectly. To do so, simply turn the power switch on and then check whether there is no tripping of the circuit breaker. If everything is fine, you can now make your way back to your new GFCI breaker.
If there is the tripping of the circuit breaker, then you will have to readjust the GFCI breaker and make some minor adjustments for it to work properly.
Step 8: Reinstall the cover of the service panel
After you have removed its cover, you can now install it back again in its place. To do so, simply insert all of its screws back and then tighten them a bit to make it secure.
Also, ensure that your testing procedures match the ones recommended by the manufacturer.
When should I involve a professional electrician?
From the steps we have outlined, installing a GFCI seems to be a simple and straightforward process. You only need a few tools and follow the procedures above.
However, there are times and situations where this job may be quite technical and you may have to hire a professional electrician. One such situation is if you are not well-versed with matters pertaining to electricity and electronics. To avoid making errors during the installation, you will definitely opt to bring in an experienced person.
Also, we cannot ignore the risks associated with electricity. You may be easily electrocuted. Bringing in an expert’s hand will save you from such risks and anxiety.
Do I need a GFCI?
Ground fault breakers play an important role in guaranteeing the safety of the electric circuit. They are designed to detect and react to the ground fault.
The National Electrical Code (NEC) requires the installation of a GFCI in any new installation. It also requires the replacement of existing GFCI with a new one when required.
A GFCI can be installed in any of the following areas:
– Under the sink
– In the bathroom
– In the garage
– In the laundry room
– Under cabinets in the kitchen
– Under appliances in a kitchen and living room area.
It is also required in places where water may come into contact with electrical equipment, such as: bathroom, laundry room, kitchen and garage.
What is the ideal position for the GFCI?
The GFCI should be installed at least 18 inches (457 mm) from any point of entry to an electrical circuit. It should be installed at no lower than 24 inches (610 mm) above the ground or water level. It should be installed on a circuit protected by a 15 amp or higher fuse or circuit breaker that is designed to protect against overcurrents.
Protection of the GFCI
The GFCI must have an identification plate stating its purpose and rated current capacity placed on it. The GFCI must have an appropriate mounting bracket and cover plate made of non-conductive material so that it cannot be confused with any other device.
The cover plate shall be provided with a gasket hole for screwing onto the bracket so that no water can enter under it when closed. It must have its own dedicated circuit breaker or fuse which is wired through the back of the unit.
Summary
I hope this guide will help you install the GFCI circuit breaker correctly. And in case you are not sure or get stuck along the way, don’t hesitate to seek professional help from experts.
If you want to find more Electronic Components Distributors, please check out the following articles:
Electronic Components Distributors In the USA
Electronic Components Distributors In UK
Electronic Components Distributors In China
Electronic Components Distributors In India
Electronic Components Distributors In Singapore
Electronic Components Distributors In Malaysia
Electronic Components Distributors In Vietnam
Electronic Components Distributors In South Korea
- Where to buy IC chips? The Best Guide? - March 26, 2024
- Breaking Down Barriers: Overcoming Obstacles in Cross-Border Electronic Component Trade - March 4, 2024
- Everything You Need to Know About Amplifier IC Chips - March 4, 2024


