
Last Updated on October 22, 2023 by Kevin Chen
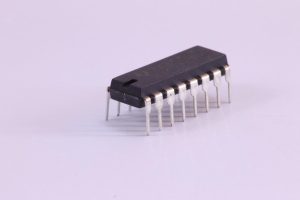
Image source Pixabay
Integrated circuits are small, and able to perform a variety of functions.
They are used in everything from simple timers and sensors to complex microprocessors. Integrated circuits can be difficult to find and purchase, but it is possible to make your own.
Are you undertaking a project that will require the use of integrated circuits? Consider taking the DIY.
It is possible to build your IC from scratch.
Making your own integrated circuit is helpful if you cannot find or afford the right one for your project or if you need several of them at once.
The process is also useful for anyone who needs a custom IC as part of an invention patent.
Materials required
While there are many ways to go about creating an integrated circuit, the following materials will get you started. Materials needed include a printed circuit board (PCB), copper foil tape, a stencil (or mask), ferric chloride, a copper etching solution, sponge, a laser printer, a photoresist, a squeegee, distilled water, a glass baking dish, a soldering iron and solder, a solder sucker, a pair of tweezers, and a multimeter.
Additionally, an integrated circuit component (IC), such as a resistor, capacitor or transistor, is needed with a circuit diagram (or schematic) that details its pinout. The component’s schematic must match the diagram that you use to create the circuit.
Step 1: Design the circuit that you want to create
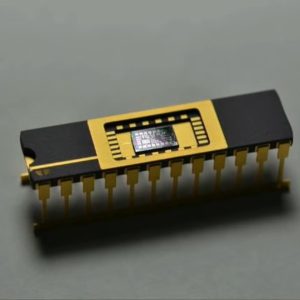
Image source hackaday
Before getting started on the physical process of making an integrated circuit, you need to design the circuit. The process is largely the same as designing a PCB, but without the physical board.
Since you won’t have the board to work with, you will have to make some adjustments. This includes designing your circuit on paper or even a computer using a special software application.
You will also need to keep a few considerations in mind during the design phase. First, circuits that require high current will need a thicker trace than those with low current. Likewise, circuits with high frequencies need a thinner trace than low-frequency circuits. Finally, voltage must be considered. The higher the voltage, the thicker the trace must be to handle the current.
Step 2: Print the circuit
If you are making an analog circuit, you will first need to convert it to a digital version. The exact digital conversion process will depend on the program you are using, but the basic idea is to translate each voltage signal in your design into a 1 or 0 (or a high or low signal).
Because integrated circuits are so tiny, it is not feasible to print a 1:1 scale design. Instead, you will need to reduce the size of the circuit. A standard circuit board is usually 1 inch by 1 inch. Therefore, the board that you print will need to be considerably smaller. The easiest way to do this is to find a small physical object in the room that you are designing the circuit in, such as an oddly-shaped piece of paper, plastic or something else.
Use that object as a template and draw your circuit on the paper. When you have the circuit designed, print it on a piece of paper. Make sure the circuit is printed in mirror image, with the copper side facing up.
Step 3: Create a metal mask
The next step in making an integrated circuit is to create a metal mask that will etch the circuit. A metal mask is a stencil that will create the circuit pattern on the PCB. To do this, you will need a photoresist. The photoresist will be used to create a negative image on the PCB by exposing it to light.
Put the PCB on a flat surface and apply a coat of photoresist to it. Make sure to leave about 1/4-inch border around the entire circuit. After the photoresist is dry, place the stencil over the circuit and put it under a light. Make sure that the light is coming from the same side as the stencil.
Step 4: Deposit the metal
This step entails depositing a thin layer of metal on each layer of the PCB. For the top layer, you will use a resistive metal-etching (RM) solution.
For the bottom layer, you will use a non-resistive solution. Conductive materials like gold or silver are often used to make printed circuit boards, but they are expensive. Instead, you can use less expensive metals, like copper, tin or nickel. To deposit the metal on the PCB, you will need a copper foil tape and a metal etchant.
Place the copper foil tape on the PCB and then pour the metal etchant over it. The metal etchant will eat through the copper foil tape and leave a layer of copper on the PCB.
Step 5: Etching the layers
After depositing each layer of metal, you will need to etch them to the correct thickness. For the top layer, you will use ferric chloride. Pour the ferric chloride into a glass baking dish and put the PCB into the solution.
You need to let it sit in the solution until the metal layer is as thin as you want it to be. This can take anywhere from a few minutes to several hours, depending on the thickness you want.
For the bottom layer, you will use a ferric chloride etchant. Pour the ferric chloride into a glass baking dish, put the PCB in the solution and let it sit until the metal is as thick as you want it to be.
Step 6: Solder and test
After etching and depositing all the layers, you are ready to solder the circuit. This can be done by hand, with a soldering iron or a hot plate. To solder, the IC, first put a small amount of solder on a soldering iron. Touch the solder to both the IC leads and place the IC on top of the circuit.
Once the IC is on the circuit, put more solder on the soldering iron and touch both the IC and the circuit board. The solder will melt and the IC will be attached to the circuit. Next, solder the resistors, capacitors, and any other components to the circuit. Then, test the circuit. To test the circuit, first put it on a solderless breadboard. Then, connect the circuit to a power source, such as a battery or power supply, and see if it is working.
Or just find an affordable integrated circuit?
Is the DIY route too much work for you? Consider buying a ready-made circuit breaker in China. If you are concerned by the cost, then you should try to find affordable ICs for sale. There are many of them in the market, so finding one won’t be a problem.
All you need is to choose a reputable IC supplier in China.
If you want to find more Electronic Components Distributors, please check out the following articles:
Electronic Components Distributors In the USA
Electronic Components Distributors In UK
Electronic Components Distributors In China
Electronic Components Distributors In India
Electronic Components Distributors In Singapore
Electronic Components Distributors In Malaysia
Electronic Components Distributors In Vietnam
Electronic Components Distributors In South Korea
- Where to buy IC chips? The Best Guide? - March 26, 2024
- Breaking Down Barriers: Overcoming Obstacles in Cross-Border Electronic Component Trade - March 4, 2024
- Everything You Need to Know About Amplifier IC Chips - March 4, 2024


