
Last Updated on October 22, 2023 by Kevin Chen
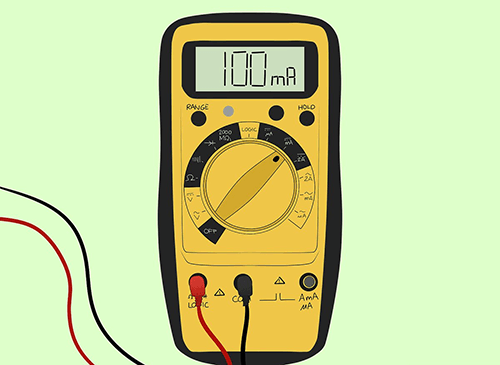
Image credit: wikihow.com
Most people think of a multimeter as a device that measures voltage, resistance, and maybe even frequency. However, a multimeter has many more uses than that. You can also use it to measure amps (alternating current) or AC current.
Even though most multimeters don’t come with an amps measurement as one of its standard features, you can usually find this measurement on the device if you read the user manual and understand how to use the right settings.
In this article, we’ll explain how to measure amps with a multimeter.
Know the basics of a multimeter
To get started, you should first try to familiarize yourself with a multimeter. Most digital multimeters tend to have the same appearance. They are usually black, and rectangular, and have a screen, buttons, and a probe.
These devices usually come with many different settings that you can access by turning the dial on the front. Some of these settings include volts, resistance, and frequency or AC voltage.
The amp symbol on a multimeter is indicated by the symbol A. You can also measure the milliamps and microamps indicated by the symbols mA and uA respectively.
Also, modern multimeters have functionalities that allow you to switch between AC and DC voltage. You may also configure various settings that will enable it to measure amps.
How To Measure Amps With A Multimeter?
Now let’s look at the steps you should follow when using a multimeter to measure amps.
Step 1: Configuring the multimeter
First, you should configure your multimeter to measure amps. To do this, you should turn the dial on the front of the device to the “amps” setting.
The configuration process may also include setting the multimeter’s range. This ensures that you get an accurate reading. The range you should set depends on the type of circuit you are measuring the amps for. For example, a range of 10 amps is ideal for measuring a 12-volt battery.
The good thing is most modern digital multimeters have an auto-ranging feature. They are designed to automatically select the range once you start testing.
My multimeter does not have an auto-ranging option? Proceed to put the dial on the 10A.
Use a plug-in clamp
Still in the configuration, there are times when your multimeter may not have high ratings that match that of the circuit. For such situations, you will need to use a plug-in clamp- it will extend the range of the multimeter.
You simply need to plug the leads of the clamp into the multimeter. Connect the other end of the clamp to the circuit. You will connect the clamp to the live wire.
Take note that when using a clamp, it will not be part of the circuit.
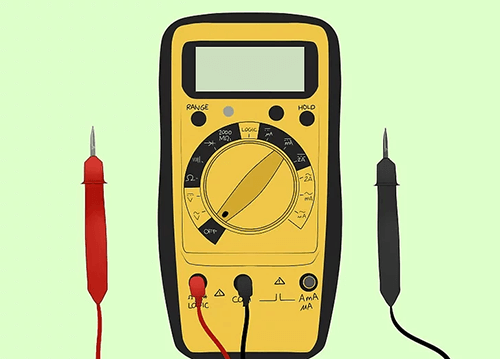
Insert the black probe into the “COM” socket
A typical multimeter should have Red and Black probes. During the configuration, ensure that the black probe is in the “COM” (common) socket. If you don’t see the label “COM” you should proceed to plug the black probe into the port labeled “Negative”.
Insert the red probe into the socket marked “A”
There are various ports in which you can insert the red probe. Since our interest is to determine the amperage, you will insert it into the p[ort labeled “A”.
Some multimeters have ports labeled “A”, “10A” and “mA”. So, which one should you use?
The labels only dictate the value of amperage that the multimeters measure. If you are not sure which port to use, just go ahead with the “A” socket.
When measuring the multimeters, don’t use the sockets labelled V and W.
Select the AC or DC current on the multimeter
The last step for the configuration entails choosing the type of current for the circuit.
The multimeter is configured to measure AC current. So, you will select “AC” on the multimeter.
On some models, you will find a switch that allows you to choose the type of current. In other models, there will be a dial or a button that needs to be adjusted.
Set your multimeter to a higher amp
As mentioned above, the type of current to be measured will dictate the range of current that the multimeter measures.
When measuring AC current, you will set your multimeter to measure a higher amp.
Since you want to measure an amperage of about 5 amps, you will set it at 10 amps.
The 10-amp setting is often found on the dial or button on the front panel. If there is no button, then you will have to adjust the dial until it reaches 10 amps.
If there are no markings on your multimeter, then ask someone who knows how to use it. He/she can give you advice on how to do this step accurately.
Step 2: Testing the Amps
Now that you are done with the multimeter configuration the next step is to test for the amps and even current. Here are the steps to take:
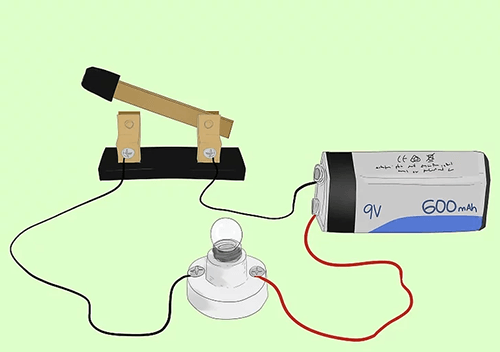
-Turn off the power supply to the circuit: You can only find out the amperage by connecting the multimeter to the circuit. In other words, it should be part of the circuit. So, you should start by turning off the power supply and disconnecting the positive cable from the power source.
-Strip the ends of the circuit wires: In most cases, you will have to wrap the wires of the circuit on the prongs of the multimeter. For the fully insulated wires, you will have to strip their ends using clippers.
-Wrap the positive wire to the positive probe: Now that the section of the wire is exposed after stripping, you will have to wrap it around the positive probe of the multimeter.
-Wrap the negative wire to the negative probe: After that, you will have to wrap it around the negative probe of the multimeter.
-Read the meter: Now that the probes are connected and everything seems to be in the perfect place, you can proceed to read the multimeter for the values of current and amperage.
After about 60 seconds, you will be able to read the figures on the multimeter.
-Calculate the amperage: If you have read above 1000 mA, the current is over 1 amp. You will also have to multiply the current by the number of seconds in which you were connected to the circuit.
How do I know if my multimeter is good?
Before you proceed with the issue of measuring the amps, you have to ensure that the multimeter is in a perfect working condition. But, how can you tell that?
There are various ways of verifying this. First, you can plug the multimeter into a wall socket and check it with your volt meter. If the voltage is not there, then you know that the multimeter might not be working properly.
But if you use this method, ensure that you don’t go overboard by testing all the sockets in your house. You can also try another wall socket to see if it works fine.
You can also check with a known good multimeter by doing some simple checks:
-Make sure that all the probes of your multimeter are connected to their respective probes and are not loose.
-Make sure that there are no bent pins or broken wire on any of the probes.
-Check for any burned wires and replace them as soon as possible to avoid any further damage to your multimeter.
-If it has been a few years since you bought this multimeter, make sure that its batteries have not run out yet so that it doesn’t give wrong readings and cause damage to other electronics in your house.
Safety tips when using a multimeter to measure amps
Since we are dealing with electricity, safety should always be your top priority. Some of the safety measures that you should consider when using a multimeter to measure amps include:
-Always use the correct multimeter.
-Always do a safety check before you start using your multimeter.
-Always connect the probes of your multimeter to their respective probes and not loose or disconnect.
-Always make sure that you are not doing any work in an area with high voltage electricity, like near power lines or transformers.
-Always wear some protective goggles and gloves when working with different types of electricity.
-Always make sure that your multimeter is in a safe place and will not cause any damage to your house or any other electrical equipment.
-Always make sure that you are not touching the probes of the multimeter when measuring amps.
Conclusion
Now you know the basics and the steps to follow when using a multimeter to measure amps. By following this guide, you can be on the safe side and measure amps safely.
And if you want to buy a multimeter?
There are many different types of multimeters available on the market and you can choose from them according to your needs. The most common types of multimeters are:
-Digital Multimeter.
-Analog Multimeter.
-Power Supply Multimeter.
-Multitester.
Choose one that will meet your testing needs. In most cases, a digital multimeter will be a perfect choice.
If you want to find more Electronic Components Distributors, please check out the following articles:
Electronic Components Distributors In the USA
Electronic Components Distributors In UK
Electronic Components Distributors In China
Electronic Components Distributors In India
Electronic Components Distributors In Singapore
Electronic Components Distributors In Malaysia
Electronic Components Distributors In Vietnam
Electronic Components Distributors In South Korea
- Where to buy IC chips? The Best Guide? - March 26, 2024
- Breaking Down Barriers: Overcoming Obstacles in Cross-Border Electronic Component Trade - March 4, 2024
- Everything You Need to Know About Amplifier IC Chips - March 4, 2024


