
Last Updated on October 22, 2023 by Kevin Chen
Capacitors are categorized among passive electronic components. The main function of a capacitor is to store the electrical energy that is in a defined electric field.
A typical capacitor is designed to have two terminals. The effect of using a capacitor is known as capacitance.
So, when you introduce a capacitor into a circuit, you will be adding the capacitance of that circuit.
How does a capacitor work?
Before we get into testing the capacitor, it will be wise to know how it works. As we have defined, the primary function of a capacitor is to store potential energy. But how does it achieve this?
A capacitor is made of two conductive plates. These plates can be made of a variety of materials including paper, plastic, mica, and Teflon. The plates are separated by an insulating film called a dielectric.
When the capacitor is connected to a voltage source, the positive plate will have a positive charge while the negative plate will have a negative charge.
What does the capacitor look like?
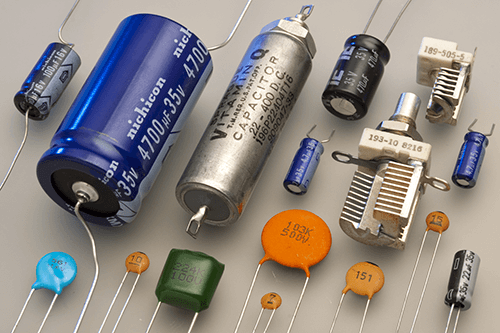
Capacitors come in many different shapes and sizes, but they are all manufactured using similar methods. The most common form of a capacitor is a small disc-shaped piece of plastic that has two metal plates on either side of it.
These two metal plates are connected by a thin layer of insulating material that separates them. A small hole on one side of the capacitor allows for more efficient current flow between them when the capacitor is connected to a battery.
Why should I test a capacitor?
Testing a capacitor is important because it indicates whether the capacitor has been damaged or not. A damaged capacitor will not be able to store electrical energy correctly. This will lead to poor performance of the circuit and may even cause damage to other components in the circuit.
The most common cause of a damaged capacitor is overcharging. Overcharging can happen if you leave a device plugged into an outlet for too long or if you leave it connected to a battery without any load. Other causes include physical damage, heat, and chemical exposure.
What are the different ways of testing capacitors?
There are several ways you can test a capacitor for any defects:
Voltage test
This is the most simple test you can perform on a capacitor. It involves applying an AC source to the capacitor and measuring the voltage across it. If you see a voltage reading then that means the capacitor is in good condition. If you don’t see any voltage reading, then it means that the capacitor is broken.
DC load test
This is another easy way to test capacitors for defects. This method involves applying a certain DC load to the capacitor and measuring its current-voltage curve under different load conditions (i.e., increasing DC loads).
If there are no defects, then this curve should be linear for all tested loads and should pass through (0V, 0A) point. If there are defects, then the current-voltage curve will be non-linear and will not pass through the (0V, 0A) point.
AC load test
This test is similar to the DC load test. The only difference is that AC voltage source is used in this case instead of DC voltage source. It is also possible to combine both AC and DC load tests and then analyze the results together.
Leakage test
In this method, the capacitor is charged with a high voltage, and then its charge decay curve is measured as a function of time. This test can be performed either in current or voltage mode, depending on the kind of capacitor you are testing.
Dielectric absorption test
This test is performed to measure the dissipation factor of a capacitor over time. This test is also known as “capacitance relaxation” or “capacitance discharge” and is a very common way to test capacitors.
When a capacitor is charged, it has a certain voltage across it which causes current to flow into and out of the capacitor.
The amount of current that flows into the capacitor and out of the capacitor depends on the capacitance of the capacitor.
If there are no defects in the capacitance, then this current will be constant during all phases of operation.
However, if there are defects in the dielectric then this current will change with time.
This change can be measured by using an oscilloscope to measure the voltage across the capacitor as well as measuring current flow into and out of it over time.
Steps for testing capacitors
Now that we have covered different methods and techniques of testing capacitors, let’s now look at the steps that you should follow and the tools to use when testing capacitors.
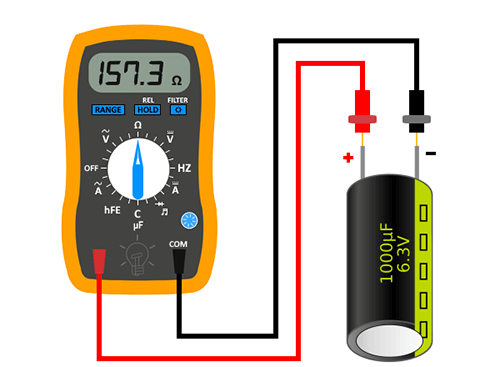
Testing a capacitor using a digital multimeter with capacitance setting
In this case, the digital multimeter has a capacitance setting. Follow these steps to do the test:
Step 1: Disconnect the capacitor from the circuit.
Step 2: Set the digital multimeter to measure capacitance.
Step 3: Connect one probe of the digital multimeter to the capacitor plates and connect the other probe to the ground.
Step 4: The reading that you get on your digital multimeter should be very close to the capacitance of your capacitor. If not, then you should replace your capacitor.
Testing a capacitor using an oscilloscope with a capacitance setting
In this case, an oscilloscope has a capacitance setting. Follow these steps to do the test:
Step 1: Disconnect the capacitor from the circuit;
Step 2: Set an oscilloscope to measure capacitance;
Step 3: Connect one probe of your oscilloscope to the capacitor plates and connect the other probe to ground;
Step 4: You should see the waveform on your oscilloscope. If not, then you should replace your capacitor.
Testing the capacitor using a digital multimeter without the capacitance setting
Step 1: Disconnect the capacitor from the circuit
Step 2: Set the digital multimeter to read the resistance.
The readings of the multimeter should read in ohms. If your multimeter has an adjustable resistance range, then set it to read up to 1000 ohms.
Step 3: Connect the multimeter to the terminals of your capacitor. Ensure that the connection is done correctly to the corresponding terminals.
Step 4: Take note of the multimeter reading, especially the initial resistance that you managed to record using your multimeter.
Step 5: Again connect the multimeter to the capacitor and take a reading.
Step 5: The readings of the multimeter should now be read in ohms. If not, then you should replace your capacitor.
Using an analog multimeter to test capacitor
If you don’t have a digital multimeter, you can proceed to use your analog multimeter for this job. Here are the steps to follow when using an analog multimeter:
Step1: Disconnect the capacitor from the circuit.
Step 2: Set the multimeter to read the resistance. This is usually indicated by OHM or the omega symbol.
Step 3: Connect the multimeter to the capacitor leads. Look at the signs of the leads that are positive and negative terminals.
Step 4: Check out the readings of the analog multimeters. A typical analog multimeter is has a needle that is usually yellow. The behavior of the needle will tell you whether the capacitor is good or bad.
If the needle starts by showing low resistance then gradually tilts to the highest value, this is a sign that the capacitor is in perfect condition.
If the needle starts by showing low resistance and does not move at all, this could be a sign that your capacitor has been shorted. It leaves you with no option but to do a replacement.
If the needle starts by showing high resistance and gradually tilts to the lowest value, this is a sign that the capacitor has been discharged. It leaves you with no option but to do a replacement.
If the needle shows high resistance and does not move at all, this could be a sign that your capacitor has been shorted. It leaves you with no option but to do a replacement.
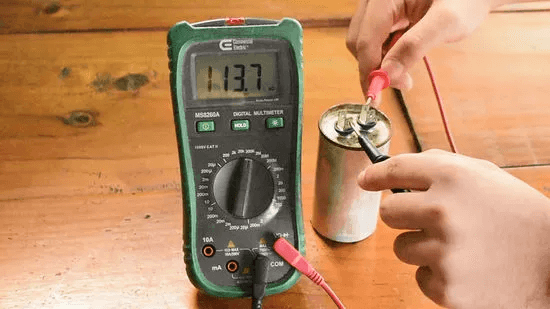
Testing the capacitor using a voltmeter
Other than multimeters, you can also test your capacitor using a voltmeter. Here are the steps to follow when using a voltmeter:
Step1: Disconnect the capacitor from the circuit.
Step 2: Set your voltmeter to measure DC volts; The readings of your voltmeter should be very close to zero volts.
Step 3: Connect one probe of your voltmeter to the capacitor plates and connect the other probe to the ground;
Step 4: Check the voltage rating of your capacitor. This information is usually indicated on the cover of your capacitor. The number is usually indicated by the capital V. It is important to check the voltage rating of your capacitor as this will determine how much power your capacitor can tolerate.
Step 5: If you have a 12-volt battery, you should be able to get about 12 volts from the negative terminal of your battery. If not, then you may need to replace your capacitor.
Signs of a bad capacitor
Other than doing all the above tests, several tell-tale signs will warn you of problems in your capacitor These signs may vary from one device and application to another. These signs include:
-The device does not start or turn on: If your device does not start or turn on, this could be a sign of a problem in your capacitor.
-The device hums or buzzes: Do you hear a hum or buzzing sound when you turn on the device? This could be a sign of a problem with your capacitor.
-The device has no power: If you are not getting any power from your device, this could be a sign of a problem with your capacitor. In some cases, this is caused by an open circuit in the wiring between the battery and the circuit board.
-The device has a sound similar to an electric motor running: If you hear a sound similar to an electric motor running, this could be a sign of a problem in your capacitor.
-The device will not run from the battery and you have tested the wiring: If you have tested the wiring and it still does not work, then this could be due to an open circuit in the wiring between your battery and circuit board.
If you are not getting any power from your device and it does not turn on, then check for these signs:
-The device has a smell of burning plastic: This is among the most common signs of a bad capacitor. The smell could be due to a bad capacitor, or a connection that is burning.
-The device will not hold a charge when it is connected to the battery (or if you remove it from the battery): This is another sign that something is wrong with your capacitor. If you are getting a charge from your device while connected to the battery, then there is likely a problem with one of the wiring connections between the capacitor and circuit board.
Can I test the capacitor without removing it?
The capacitor can be tested without removing it from the unit, but it is not recommended. Testing the capacitor without removing it from the unit will allow you to determine if there is a problem with your capacitor or if there is something else wrong with your device.
What should I look for when buying multimeters?
As we have seen, multimeters play an important role when it comes to testing capacitors. Both digital and analog multimeters are capable of testing your capacitors and giving accurate results.
So, it is important to buy the best multimeters in the market. Check out all the critical features of the multimeter to ensure that it is in proper working condition.
Conclusion
I hope that this guide has given you all you need to know about testing capacitors. I would like to conclude this guide by saying that testing capacitors is not an easy job. You have to be very careful about it.
I recommend you to buy a multimeter which has a high continuity feature. You will be able to test your capacitors easily and accurately with this feature.
At ICRFQ, we have different types of multimeters that you can use for testing your capacitors. You can buy any of those multimeters online.
If you have any queries, please feel free to contact us.
If you want to find more Electronic Components Distributors, please check out the following articles:
Electronic Components Distributors In the USA
Electronic Components Distributors In UK
Electronic Components Distributors In China
Electronic Components Distributors In India
Electronic Components Distributors In Singapore
Electronic Components Distributors In Malaysia
Electronic Components Distributors In Vietnam
Electronic Components Distributors In South Korea
Electronic Components Distributors In Taiwan
Electronic Components Distributors In Hong Kong
- Where to buy IC chips? The Best Guide? - March 26, 2024
- Breaking Down Barriers: Overcoming Obstacles in Cross-Border Electronic Component Trade - March 4, 2024
- Everything You Need to Know About Amplifier IC Chips - March 4, 2024


