
Last Updated on October 22, 2023 by Kevin Chen
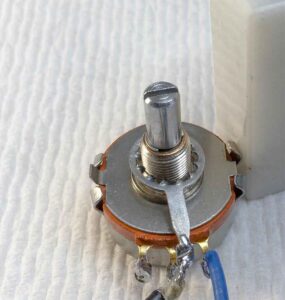
Image source Music Electronics Forum
Is your potentiometer dirt? You will have to clean it. After all, when was the last time you cleaned your potentiometer? Like most electronic components, you need to ensure that your potentiometer is in perfect operational condition. This is the surest way of getting the best results from it.
The fact that the working mechanism of a potentiometer entails some form of movement even makes it more necessary to have it in proper shape. It should be devoid of dirt, dust, and debris.
In this article, we are going to highlight the key steps of cleaning a potentiometer. We will also cover some reliable cleaning solutions that you should use on your potentiometer.
Overview of a potentiometer and how it works
Before we get our hands dirt in cleaning a potentiometer, it will be prudent to know the basics of how it works.
A potentiometer is a type of variable resistor. So, it controls and regulates the flow of electric current in a circuit.
The basic structure of a potentiometer comprises of electric terminals and a movable wiper. You will adjust the position of the movable wiper to vary the resistance value of the potentiometer. In doing so, you will be able to directly affect the final voltage and current in the circuit.
Where are potentiometers found? Think of any electric device that entails the adjustment of some values to affect the output.
Radios, audio devices, display systems, and even motor devices are just some of the devices in which potentiometers are used.
Types of potentiometers
Also, before you get into the cleaning process, you should know the type of potentiometer that is at your disposal. This knowledge will help you design on the cleaning methodology and technique to use.
There are two main types of potentiometers. These are the rotary potentiometer and slide potentiometer.
Rotary potentiometers are the most common in the market. As the name suggests, their operation mechanism entail rotating a knob that is connected to a shaft. The rotation will adjust the value of resistance.
The slide potentiometers have a slider that you will move in a straight line to change the resistance value. They are commonly known as faders and you will find them in devices such as audio mixers.
Steps of cleaning potentiometers
Regardless of the type of potentiometer at your disposal, here are the general steps of cleaning a potentiometer:
Step 1: Turn off the device
This will always be the first step that you should take when working on electric devices. It is a safety procedure that is designed to protect you from the risk of electric shock. Ensure that the device or appliance whose potentiometer you want to clean is turned off and unplugged from the socket.
It is also advisable that after unplugging you should leave it for at least 20 minutes to loose the stored electric charge. This is vital because some appliances are still dangerous even after being unplugged.
Step 2: Locate the potentiometer
After implementing the safety measure in step 1, the next step is to find the exact location of the potentiometer. You should be able to identify a rotary potentiometer by its design: a cylindrical knob with a rotating shaft.
In most applications, potentiometers are easily visible so you should have an easy time when it comes to locating one.
Not sure about the exact location? You should consider consulting the manufacturer’s manual.
Step 3: Remove the potentiometer from the circuit
Now is the time to get a little bit technical. In this step, you will have to separate the potentiometer from the device and the panel so that you can clean it well.
In most devices, you will just need to unscrew the nuts that are holding the potentiometer to its position. In other devices, you will only have to unclip the clips holding the potentiometer.
Simple tools such as a screwdriver will do the job. You may have a pair of pliers as a backup plan.
Step 4: Gently clean the potentiometer
Once you have the potentiometer, start by doing the basic cleaning. Clear the solid debris and dirt on the surface of the potentiometer.
A dry piece of cloth will come in handy in this step. Use it to wipe all the parts of the potentiometer. Alternatively, you can use a soft brush to clean those hard-to-reach sections of the potentiometer.
After repeatedly wiping and cleaning, you can proceed to the next step of the job.
Step 5: Use a potentiometer cleaning solution
Now it is time to work on the unseen dirt. In this step, you will need a recommended cleaning solution designed for the potentiometer.
Most of us tend to go for a potentiometer cleaner spray that has been recommended by the manufacturer.
Others prefer to clean the potentiometer with alcohol while others use WD40 solution and Deoxit potentiometer cleaner.
So, which is the best potentiometer cleaner?
A contact cleaner recommended by the manufacturer is an ideal solution. All you need is to spray the cleaner on the shaft and even the terminals of the potentiometer. Then you can use a piece of cotton cloth to spread the cleaner over the surface of the potentiometer.
The best cleaning practice is to rotate the shaft clockwise and anticlockwise so as to allow the contact cleaner to spread evenly.
Step 6: Wait then reinstall
Once you are satisfied with the results of the previous step, it will be prudent to give the potentiometer some time for the contact cleaner to dry. This will only last for less than 10 minutes.
Once it dries up, you can proceed to reinstall the potentiometer back to its original position. Be careful with the reinstallation to ensure that the potentiometer is well-secured and ready to be used.
After the installation, you can go ahead to do some test. Switch the device on then find out whether the potentiometer is working or not.
If you follow the steps we have outlined, you will end up with a clean potentiometer. And if you are not sure of how to do it, allow a professional electrician to help you.
If you want to find more Electronic Components Distributors, please check out the following articles:
Electronic Components Distributors In the USA
Electronic Components Distributors In UK
Electronic Components Distributors In China
Electronic Components Distributors In India
Electronic Components Distributors In Singapore
Electronic Components Distributors In Malaysia
Electronic Components Distributors In Vietnam
Electronic Components Distributors In South Korea
- Where to buy IC chips? The Best Guide? - March 26, 2024
- Breaking Down Barriers: Overcoming Obstacles in Cross-Border Electronic Component Trade - March 4, 2024
- Everything You Need to Know About Amplifier IC Chips - March 4, 2024


