
Last Updated on May 19, 2022 by Kevin Chen
There are numerous single-pole switches in every home. They’re used to turn 120-volt circuits for lighting, furnace disconnects, garbage disposals, and other appliances. Learn how to wire a single-pole switch with ease. You’ll be turning lights on and off in no time with this straightforward how-to. With a few essential electrical tools and these instructions, you can quickly replace or install a single-pole switch. But, before we go into the procedure of wiring a single-pole switch, let us first define it.
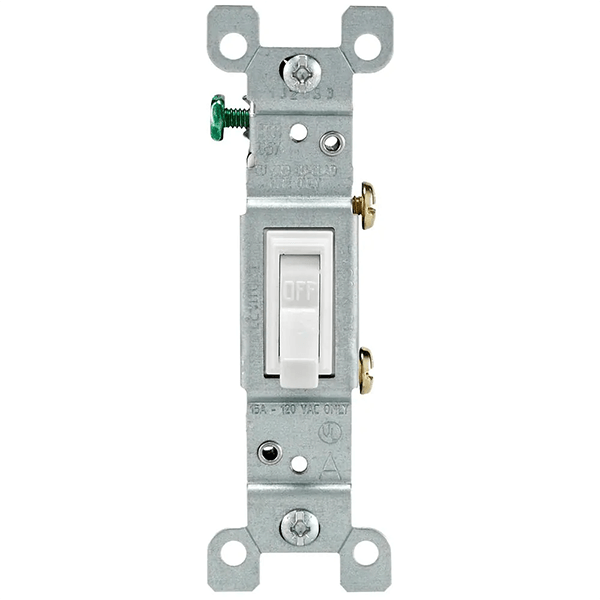
What is a Single Pole Switch?
A single-pole switch has one input and output and can be switched on or off. They can be latching or momentary, and they are typically wired open or closed.
Single-pole switches are divided into single-pole single-throw and single pole double throw.
Poles and Throws
Pole
A switch’s pole relates to the number of distinct circuits it can control; a single-pole switch can control one circuit, while a double-pole switch can control two.
Throw
A switch may activate numerous places with throws. A single-pole switch closes a circuit in one position, while a double-pole switch closes two circuits.
Single pole double throw switches are used to turn a piece of electrical equipment on or off. Single pole single throw switches, such as light switches, are utilized in applications where the switch is either “on” or “off,” establishing or breaking a connection.
How Switches Work
Switches control the flow of electrical current in the hot wire, with electricity entering through the wire attached to the bottom of the switch and exiting through the wire attached to the top of a light or other electrical device.
Hotwires are black or red in most homes, neutral wires are white, and ground lines are bare or green; nevertheless, the hot wire to a switch may be white under specific circumstances. If the hot wire is white, the black electrical tape should be put around it to signal that it is a hot wire.
How to Wire a Single pole Switch?
Turn Off the Power First
Shorted switches expose you to live parts, putting you at risk of electrical shock. Arcing, heat, and fire are all risks associated with faulty switches. Safety should always be your primary consideration while performing any electrical repair. Turn off the circuit you’re about to work on and double-check it using a voltmeter or circuit tester. Never presume that the circuit has been turned off! This is true for both new and current electrical systems.
Remove the Existing Switch (If Necessary)
Remove the two screws that hold the switch cover plate in place. The switch has finally been revealed. Remove the two screws that keep the switch in place and gently take it out. Now is the time to get out the tester and double-check to verify if the circuit is still open. Test the switch from the green ground screw or the metal box to the two brass screws. If there is no power, you may proceed. Remove the two brass screws and the ground screw by loosening them. Remove and discard the switch.
Protect Your Paint
Removing the wall cover plate is difficult because these switch covers might become stuck to the paint on your walls.
To avoid removing the paint from the exposed portion of the wall, carefully cut around the outside of the switch cover with a utility knife until it comes off.
Test for Electricity
We want to know that the electricity has been turned off. Use a voltage detector to double-check whether the switch is still powered on.
Place the detector inside the switch box and use the voltage detector to test the wires on both sides of the switch. The sensor will light up or begin to beep if there is still an electrical current.
Return to the breaker box and check if the relevant breaker switch has been switched off or if the voltage detector starts beeping or flashing. Rep this procedure until the appropriate breaker has been shut off and the voltage detector has verified that no power is supplied to the switch box.
Remove Old Switch
Remove the old single pole switch before wiring the new one. Isn’t that correct? Remove the screws from the top and bottom of the switch to accomplish this.
The old single-pole wall switch can stick to the wall paint like the switch cover plate. To avoid stripping the paint, cut around the top and bottom of the switch with your utility knife before removing it to prevent any potential paint damage.
Access Old Switch
Pull the switch away from the wall gently. Remember that wires will be attached to it, so don’t pull it out too far, or the connections may be damaged. Remove the switch from the wall to give yourself enough room to inspect the wiring.
If the switch box appears to have extra wires, they are there if the switch needs to be converted to a three-way switch system. Three-way switches allow you to control a light from two different locations.
When installing a single-pole switch, use only the three already connected wires, and don’t worry about the extra wires in the switch box. Close the additional wires with a wire cap, leave them alone, and move on.
Strip the Electrical Insulation from the Wires
If this is a new installation, remove 3/4″ of the insulation off the wires before making the connections.
Connecting the New Switch
To wrap the wire around the screws, bend the ends into a half-moon shape. Tighten the green ground screw to the bare copper or green wire first. Connect the two black wires to the brass-colored screws that are left. (These wires could be black, red, or white, depending on the wiring technique.) White must be tagged with identifying tape if utilized as a positive current-carrying conductor in recently installed wiring.) In a clockwise motion, tighten the half-moon shape towards the right. This guarantees a reliable and secure connection.
Wrap with Electrical Tape for Added Safety
I like to wrap the switch with electrical tape once the connections are firm for increased safety. The switch will no longer make contact with the box’s side. Now, for a test fit, press the switch into the box. To make everything fit, you might need to tweak the wiring in the box. Tighten the two screws in the box as much as possible to maintain it plumb. Tighten the two screws holding the switch cover in place. You’ve completed the task!
Turn on The Power and Test Switch
Check to see if everything is working by turning on the circuit at the breaker panel. The switch should turn the light on and off. Examine the toggle part of the light switch to ensure it is appropriately placed. If the light is on, it should say “on,” and if it is off, it should state “off.” If that’s the case, you’ve finished your “light duty” for the day!
How to take off a single-pole light switch from the wall
A single-pole in-wall light switch may need to be removed for various reasons. It could be used to repair or replace an existing wall box with a new fixture or replace an outlet or light switch with a different kind. As long as the fixture is the same type, this procedure is similar to removing a single-pole switch.
If your old single pole in-wall switch is over a light fixture, disconnect the wires from the switch’s terminals and connect them to a new duplex receptacle.
Last but Not Least
Electrical Service Panel Basics Homeowners Should Know
There are a variety of reasons why homeowners should learn about their electrical service panels. For example, if you have a brownout or blackout and can’t use any of your home’s breakers, knowing how your service panel works will help you quickly restore power.
The major purpose of the breaker panel is to keep the voltage levels in your home under control (120 volts). As a result, they can be used to turn off the electricity as necessary. The entire panel is usually found outside the house beneath an electrical meter. It can also be found on the wall of an entryway closet. However, they can be challenging to identify because they are hidden below drywall, where no one can see them (which is why most homeowners are unaware of their existence).
Knowing the fundamentals of electrical service panels will make working on your home’s electrical system much easier. It will help you avoid having to call a certified electrician every time a minor issue arises.
Conclusion
Finally, after reviewing the many types of wiring and installation scenarios discussed in this post, I hope you now understand how to install a new switch in your home. Single-pole switches, in my opinion, should be simple enough for anyone to handle with ease if they take their time and carefully follow the instructions.
If you’re unsure about your abilities to complete a project like this on your own, consult a professional electrician. We hope you found this article to be informative and useful.
If you’re planing to purchase single-pole switches or other electrical components, consider purchasing them from ICRFQ. We manufacturer the best electrical components in China.
If you want to find more Electronic Components Distributors, please check out the following articles:
Electronic Components Distributors In the USA
Electronic Components Distributors In UK
Electronic Components Distributors In China
Electronic Components Distributors In India
Electronic Components Distributors In Singapore
Electronic Components Distributors In Malaysia
Electronic Components Distributors In Vietnam
Electronic Components Distributors In South Korea
- Where to buy IC chips? The Best Guide? - March 26, 2024
- Breaking Down Barriers: Overcoming Obstacles in Cross-Border Electronic Component Trade - March 4, 2024
- Everything You Need to Know About Amplifier IC Chips - March 4, 2024


