Last Updated on May 22, 2023 by Kevin Chen
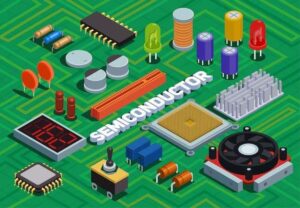
Image source Freepik
A typical semiconductor comprises of different parts or electronic components.Each part should be in a perfect working condition for the semiconductor to operate smoothly. In most cases, a flaw in one component, no matter how small the issue may be will end up affecting the overall functionality of the semiconductor. In fact the chip may even stop functioning.
Instead of replacing the whole semiconductor, you may consider troubleshooting the parts and getting the right solutions to the problem. This is what troubleshooting is all about. It entails deeply examining the parts of the semiconductor and come up with the remedies.
Given the physical nature of the semiconductors, there are various issues that can can cause lead to flaws or damage. They include improper placement of the component on the wafer, overheating, physical causes such as movement, aging of the components among many other causes.
Testing and troubleshooting procedures are designed to unravel all the causes and design appropriate solutions. It unravels both the major and minor issues in the circuit.
For a perfect troubleshooting procedure, it will be ideal to have knowledge of each part. Know its physical electrical properties since those are the things that you will be looking at when carrying out your tests. You should also know how the component works and the specific roles that it plays on the semiconductor. However, having deep knowledge on some issues will be an added advantage.
Tools you need
Here are the tools that you will need for troubleshooting and testing the semiconductor:
- Multimeter, either analog or digital
- LCR meters
- Variable power supply. This one allows you to adjust the power into the system. It will be better if the supply will have a metered indication
- Oscilloscope
Steps for troubleshooting and testing semiconductor parts
To start off, let’s give you an insights on the steps that you should follow when troubleshooting the electronic components.
Step 1: Identify and confirm the problem on the semiconductor
You want to troubleshoot a semiconductor because there is a problem or an issue that is affecting its operation. So, the first step that you should take is to isolate that issue.
Write down the problem so that you will be referring to it when doing the tests.
Let’s say you are getting low quality audio output from your system, the problem could be due to amplification issues hence the suspect will be transistor.
Note down all the symptoms, whether it is overheating, dimmer lights among others.
Step 2: Conduct a visual inspection

Image source Freepik
After confirming the issue with your electronic gadget, you can proceed to carry out a visual inspection on the semiconductor. But even before you inspect the semiconductor, start with the device.
First ensure that the device is disconnected from the power supply.
Check out for signs of physical damage on the device. This can be broken parts, burnt cases, among others.
From the device, proceed to inspect the semiconductor.
Watch out for the burnt and broken parts. You can even smell the semiconductor to detect any smell of burnt parts.
Check out the connections on the PCB so that you can identify loose or broken connections.
Caeefully inspect the soldered parts of the semiconductor. Do you spot any broken solder joints?
Try to identify shorts on the soldered points of the semiconductor.
It will also be prudent to verify the physical state of each semiconductor part to ascertain its condition.
Some remedies can be implemented right after conducting visual inspection. For example, you can de-solder the broken solder points of the semiconductor.
You will also have to replace damage electronic components on the chip.
Step 3: Testing the individual parts on the semiconductor
From the visuals, it is time to get down into real action of troubleshooting and testing. In the next steps, you will focus on each part of the the semiconductor.
Generally, you will only need to test for the voltage across each component. If a component does not indicate any voltage, then it will be a sign that it is faulty and probably needs to be replaced.
However, for a more conclusive troubleshooting and testing, you will have to carry out further tests on each part.
Let’s highlight some of these tests.
Testing diodes
You will use a digital multimeter to test the diodes on a semiconductor.The are two ways of testing diodes. These are the diodes test mode and the resistance test mode. You can use resistance test only when your multimeter does not have diode test mode.
You will have to detach the ends of the diodes from the semiconductor in order to test them.
When in the Diode test mode, you will measure the voltage drop across the diode when in forward bias or reverse bias. In the forward bias, the diode will act as a switch allowing the flow of current. There should be positive voltage reading on the multimeter. It should range between 0.5 volts to 0.8 volts (for silicon diodes) and 0.2-03V for germanium diodes.
For the resistance test, the reading should range between 1000Ώ to 10 MΏ. The resistance reading should always be high when the diode is reverse-biased.
Testing transistors
Power transistors are among the key parts of a semiconductor. There are various testing options for the transistors but first, you will have to de-solder it from the PCB. Like for the diodes, you can use both the ohm test and diode test to find out the state of the transistor.
Connect the red probe to the base terminal of the transistor and the black probe to collector. In the second test, you will connect the black probe to the emitter terminal. The multimeter readings should give values within the specified range as indicated by the manufacturer.
When measuring the resistance mode, the reading should be zero. If the multimeter reads 1 or any other value means that the transistor is faulty.
Testing thyrstors in semiconductors
This is another electronic component that you are likely to find on your semiconductor. Thyristors are usually used as power regulators and converters. They are capable of converting AC to DC current.
To test a thyristor, you will use the same procedures as for the diodes. You can use a diode test mode or go for the resistance mode.
Test the thyristor in both modes, forward and reverse biased. The readings should be similar to the ones of transistors from the previous step.
Testing resistors
You will also use the multimeter to test and troubleshoot the resistors. We do this assuming that it looks to be in a good physical condition. No burns or broken parts.
De-solder the terminals and connect them to the probes of the multimeter.
When the multimeter is in the resistance mode, it should display the resistance of the resistor in Ώ. The resistor could be in a bad state if it displays 1 or 0. You will have to consider replacing it.
It is also possible to test a resistor without using a multimeter.
Testing the capacitors in a semiconductor
Capacitors provide adequate charges that keep the electronic components running. If you notice that your device has some power issues, then the capacitors could be the cause. You will have to test their capacitance.
Before you test, do a visual inspection to ensure that there is no leakage.
A digital multimeter will come in handy in testing capacitors. But before you proceed, ensure that it is fully discharged. The simplest way to discharge a capacitor is by connecting it to a 5 ohms resistor. Once you confirm it is discharged, you can proceed with the test.
Set the DMM to the Capacitance mode. Confirm with your multimeter manual on how to engage this setting.
Connect the leads to the terminals of the capacitor then wait for a few seconds. Proceed to confirm the measurements of your DMM. If the readings is way lower or higher than as specified by the manufacturer, it could be an indication of a faulty capacitor.
Who should do testing and troubleshooting of semiconductor?
This guide is perfect for anyone who is interested in the electronic components and their applications.
Are you a hobbyist who enjoys working on the electronic projects? You will use this information to things right. Even industry experts working on similar projects will deliver accurate troubleshooting and testing thanks to the information in this guide.
Conclusion
Now you know how to test and troubleshoot semiconductor parts. After testing, take time to troubleshoot each part to establish its problem. If it is damaged beyond repair, you will have to get the right replacement.
Even when buying electronic components to replace the damaged ones, ensure that they are of the right quality and specifications. Choosing the right electronic component suppliers is the surest way of getting the right products.
Ensure that you follow all the necessary safety procedures when testing and troubleshooting these components. For example, wear appropriate gear and conduct the testing in a safe room. If you are not sure of anything, it will be prudent to involve experts.
If you want to find more Electronic Components Distributors, please check out the following articles:
Electronic Components Distributors In the USA
Electronic Components Distributors In UK
Electronic Components Distributors In China
Electronic Components Distributors In India
Electronic Components Distributors In Singapore
Electronic Components Distributors In Malaysia
Electronic Components Distributors In Vietnam
Electronic Components Distributors In South Korea
- The Ultimate Guide to IRFZ44N MOSFET - April 30, 2024
- AMD Ryzen 5 vs Intel i5: How to Choose the Right Processor? - April 30, 2024
- Where to buy IC chips? The Best Guide? - March 26, 2024