Last Updated on October 22, 2023 by Kevin Chen
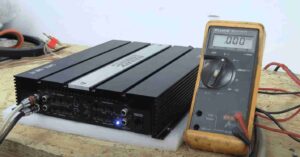
Image source NerdyTechy
When you want to get the best out of your amplifier, the noblest thing to do will be to tune it. The process entails setting it to the appropriate inputs and output voltages so that it can perform to the optimum levels.
Are you planning to tune your amplifier? You don’t have to take it to a specialist. You can tune the amplifier using a multimeter. Keep reading as I give you details on how to do this job.
Why should I tune an amplifier?
First things first, what are the key reasons that can push one to tune an amplifier? Let’s look at some of these reasons and maybe, even if you had not planned, you will consider tuning your amp.
- For the best sound quality: This is the primary reason for tuning the amplifier. The process ensures that you get the best sound quality from the amplifier. This does not necessarily mean that the amp is currently producing low-quality sound, it’s only that you want to get the best out of it. Tuning will eliminate noise and distortion of audio signals.
- To increase the lifespan of the amplifier: Do you know that tuning is also a protective mechanism for the amplifier? A well-tuned amplifier will have proper power management and at the same time utilize its energy perfectly.
Another protective measure is to prevent overheating. A badly tuned amp is likely to use more current than what it needs and this can easily lead to overheating.
- To comply with regulations: Tuning an amplifier can also be a form of corrective measure, whereby you would tune it to ensure that it is in line with the local rules and regulations. For example, if you buy an amp that is producing loud noise hence becoming a public nuisance.
For these reasons, it is crystal clear that the best way to optimize the performance of an amplifier is by tuning it.
9 steps of tuning an amplifier using a multimeter
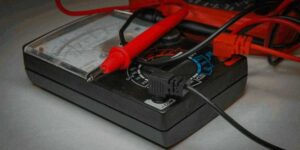
Image source Toolsweek
Now let’s look at the steps you should follow when tuning an amplifier.
The main tools and equipment that you will need for the job include:
- A multimeter
- A speaker for testing the output
- A flat screw
- A test tone.
Once you have everything in place, we can proceed with the test.
Step 1: Find out the resistance of the speaker
Before you even touch the amplifier, you will start by finding out the resistance of the speaker. You will have to disconnect it from the rest of the circuit in order to do this test. This will ensure that the readings on the multimeter are not affected by the power supply or even other electronic components.
Assuming that you are using a digital multimeter, set it to the resistance mode (Ohm settings) then its positive and negative probes to the respective terminals of the speaker. Take note of the readings. In most cases, the resistance of the speaker will range between 2Ω to 16Ω.
Step 2: Record the specifications of the amplifier
Here you should arm yourself with the amplifier’s datasheet or manufacturer’s manual. The first performance parameter that you should confirm is the wattage of the amplifier. Generally, the higher the wattage rating, the louder the sound and the deeper the bass from the amplifier.
By knowing the wattage, you will be able to calculate the target voltage of the amplifier. Here you will need a calculator to do some simple calculations.
We can obtain the target voltage using the formula V=√(P*R) whereby P is the wattage of the amplifier and R is for the resistance. Remember that we obtained the resistance from the previous step.
Step 3: Disconnect all devices and accessories from the amplifier
Here you will simply need to unplug all the power devices and accessories from the amplifier. These devices include speakers, woofers, and subwoofers among others. Ensure that the only connection remaining on the amp is the power source.
Take note of the terminals and connections of all the appliances so that you won’t have a hard time when reconnecting them. A picture before unplugging will come in handy.
Step 4: Set the amp equalizer and amp gain to zero
The main function of an equalizer in an amplifier is to balance the audio frequency. Adjust it to zero giving it the maximum bandwidth range. It determines the bass, treble and other audio parameters that you get from the amplifier.
You should do the same to the Amp gain-turn the gain knob anticlockwise to the zero value. The function of the gain is to determine the expected output in relation to the input signal.
Step 5: Set the volume to 75%
The aim of this step is to set the gain and you will do so by adjusting the volume of the amplifier up to 75%. This is a very critical step during the tuning and many people end up making mistakes here.
Setting the volume up to 75% prevents the amplifier from producing distorted sound. Ensure that the volume does not exceed the 75% level as this may end up damaging the speaker or cause signal distortion.
Step 6: Play the test tone
Play the test tone on the speaker to verify that the speaker is not connected to the amplifier. While doing so, take note of the sound rating and quality from the speaker.
Step 7: Connect the multimeter
This step is all about getting and playing with numbers. Ensure that the multimeter is on the AC voltage mode whereby the red probe is on the VΩ of the digital multimeter.
Connect the multimeter to the amplifier by matching the black probe to the amplifier’s positive terminal and the red probe to the negative terminal.
Any reading beyond 6V is a red flag meaning that you will have to reset the amplifier again.
Step 8: Adjust the amplifier gain with the multimeter
While the multimeter is still connected in the step above, you should turn your focus on the Gain knob. Adjust it using a flat screw while at the same time keeping your eye on the multimeter.
Do you remember the target voltage that you obtained in step 2? Continue adjusting until the multimeter reads that target voltage.
Step 9: Reconnect the devices
If everything in the previous step goes well, you can go ahead to reconnect all the devices and accessories to the amplifier.
Test the amplifier by playing music then be keen on the audio quality. Any distortion is a sign that you didn’t do the gain perfectly. You may need to redo the whole process.
Conclusion
By following the above steps, you will be able to tune your amplifier to the best level. In case you need any help, consider contacting a professional electrician. If you need to replace the electronic components related to amplifiers, then buy from reputable suppliers.
If you want to find more Electronic Components Distributors, please check out the following articles:
Electronic Components Distributors In the USA
Electronic Components Distributors In UK
Electronic Components Distributors In China
Electronic Components Distributors In India
Electronic Components Distributors In Singapore
Electronic Components Distributors In Malaysia
Electronic Components Distributors In Vietnam
Electronic Components Distributors In South Korea
- The Ultimate Guide to IRFZ44N MOSFET - April 30, 2024
- AMD Ryzen 5 vs Intel i5: How to Choose the Right Processor? - April 30, 2024
- Where to buy IC chips? The Best Guide? - March 26, 2024